PowerDetector
PowerDetector is an application that can be used to monitor the power connected to the device. Basically just plug the device (iPhone) into a charger and plug that charger into a wall outlet. When the power goes off/on the app will send notifications to the email addresses that have been configured in the app.
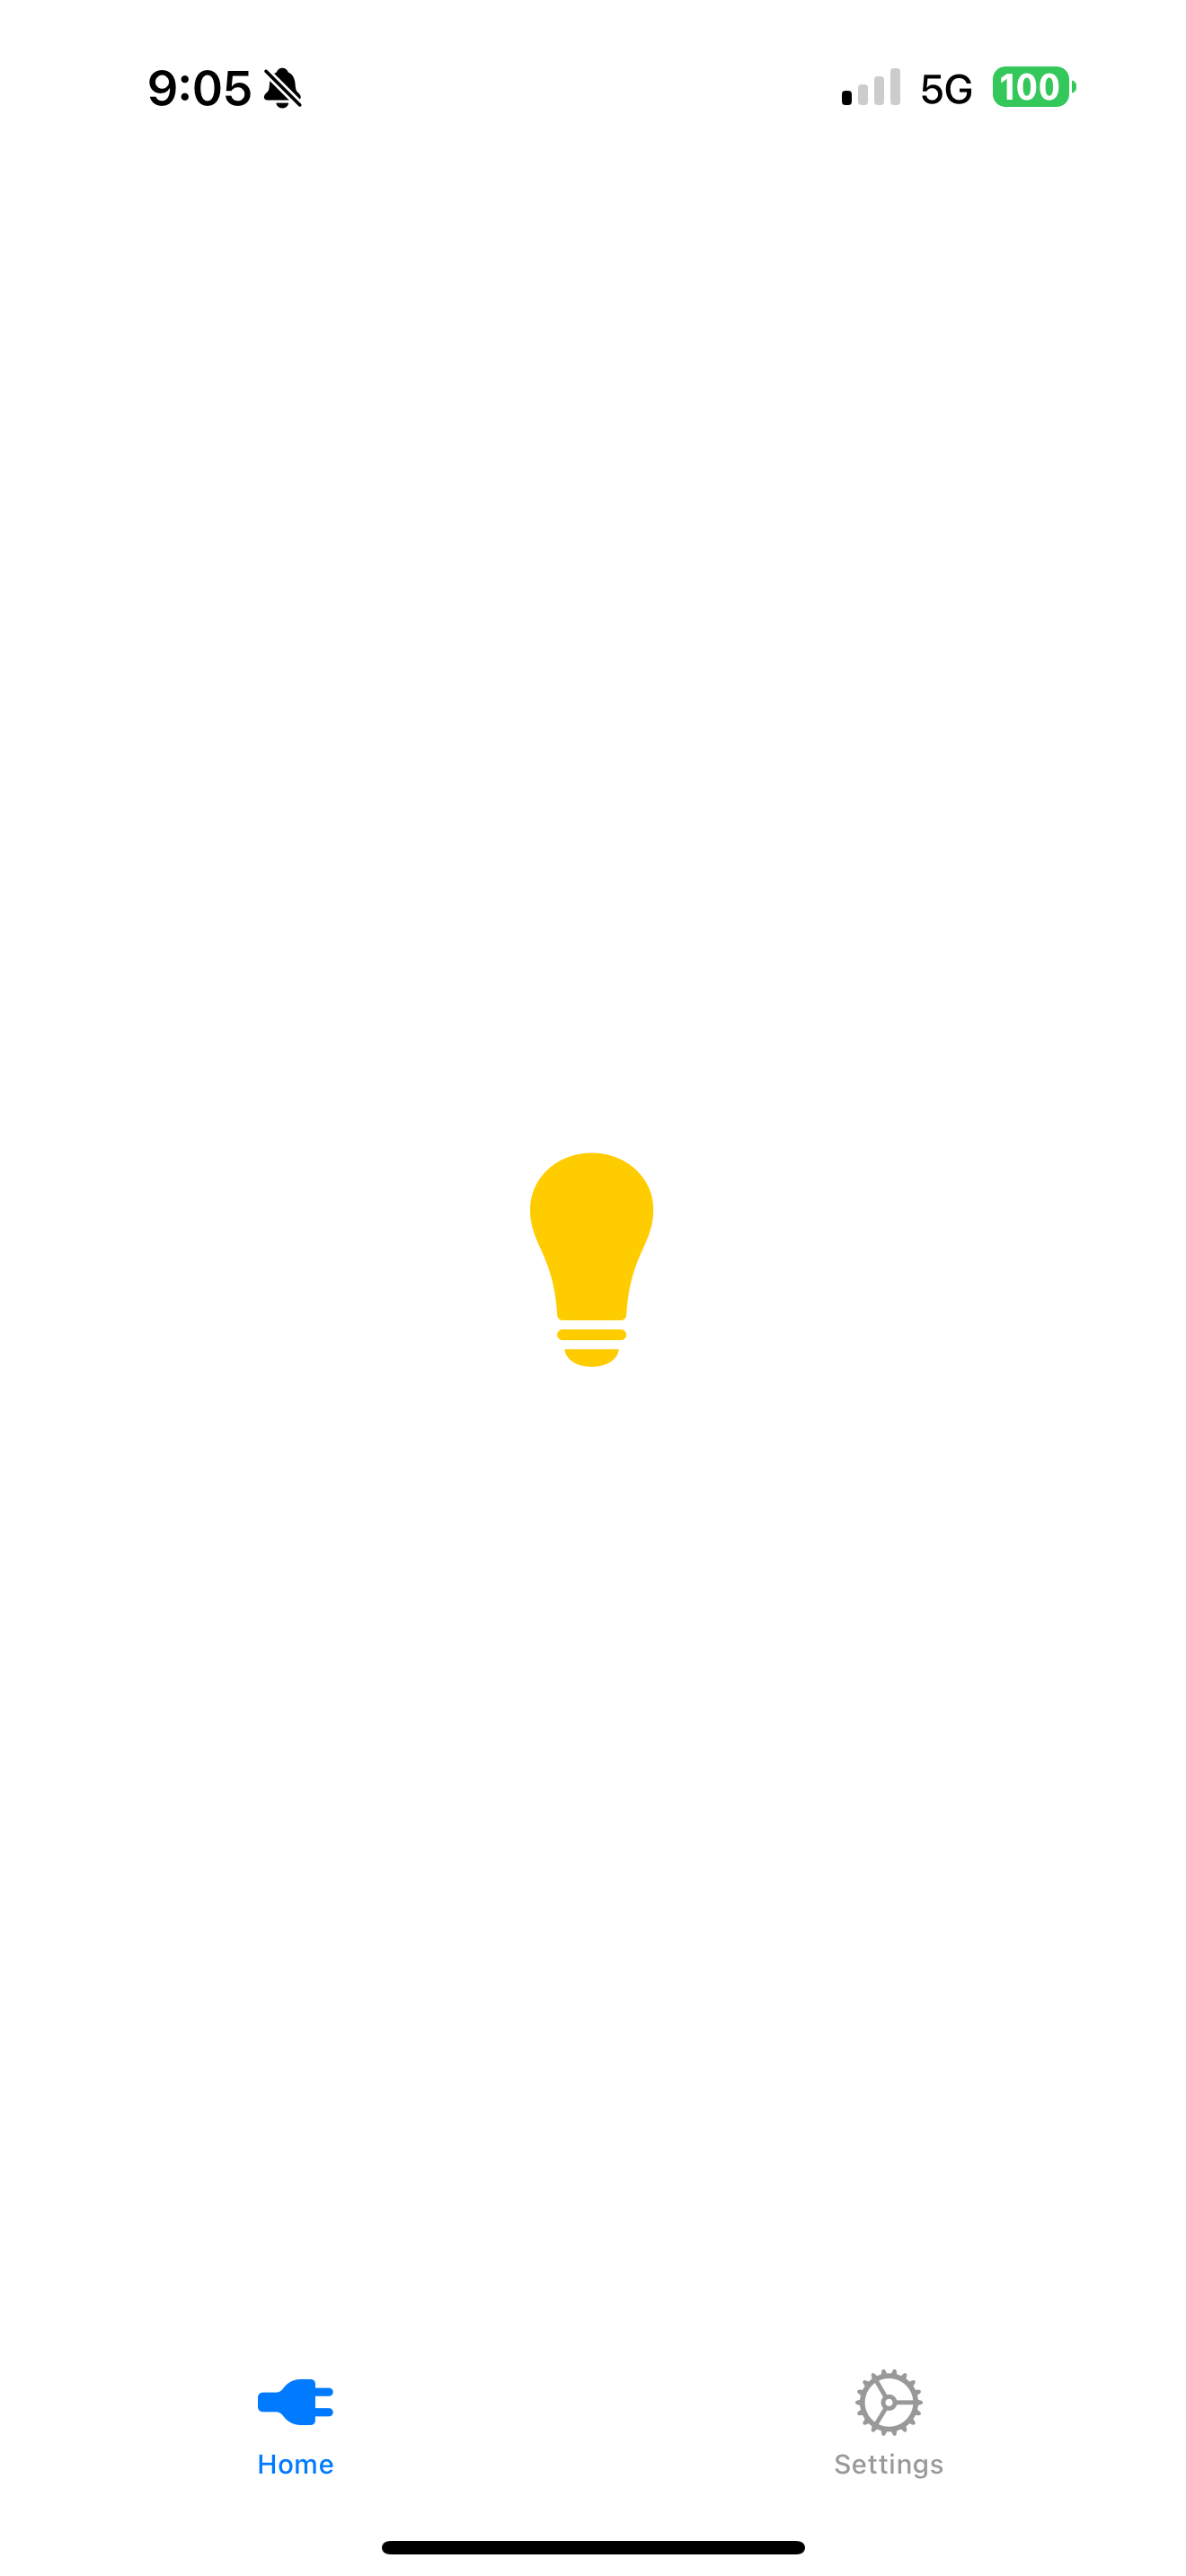
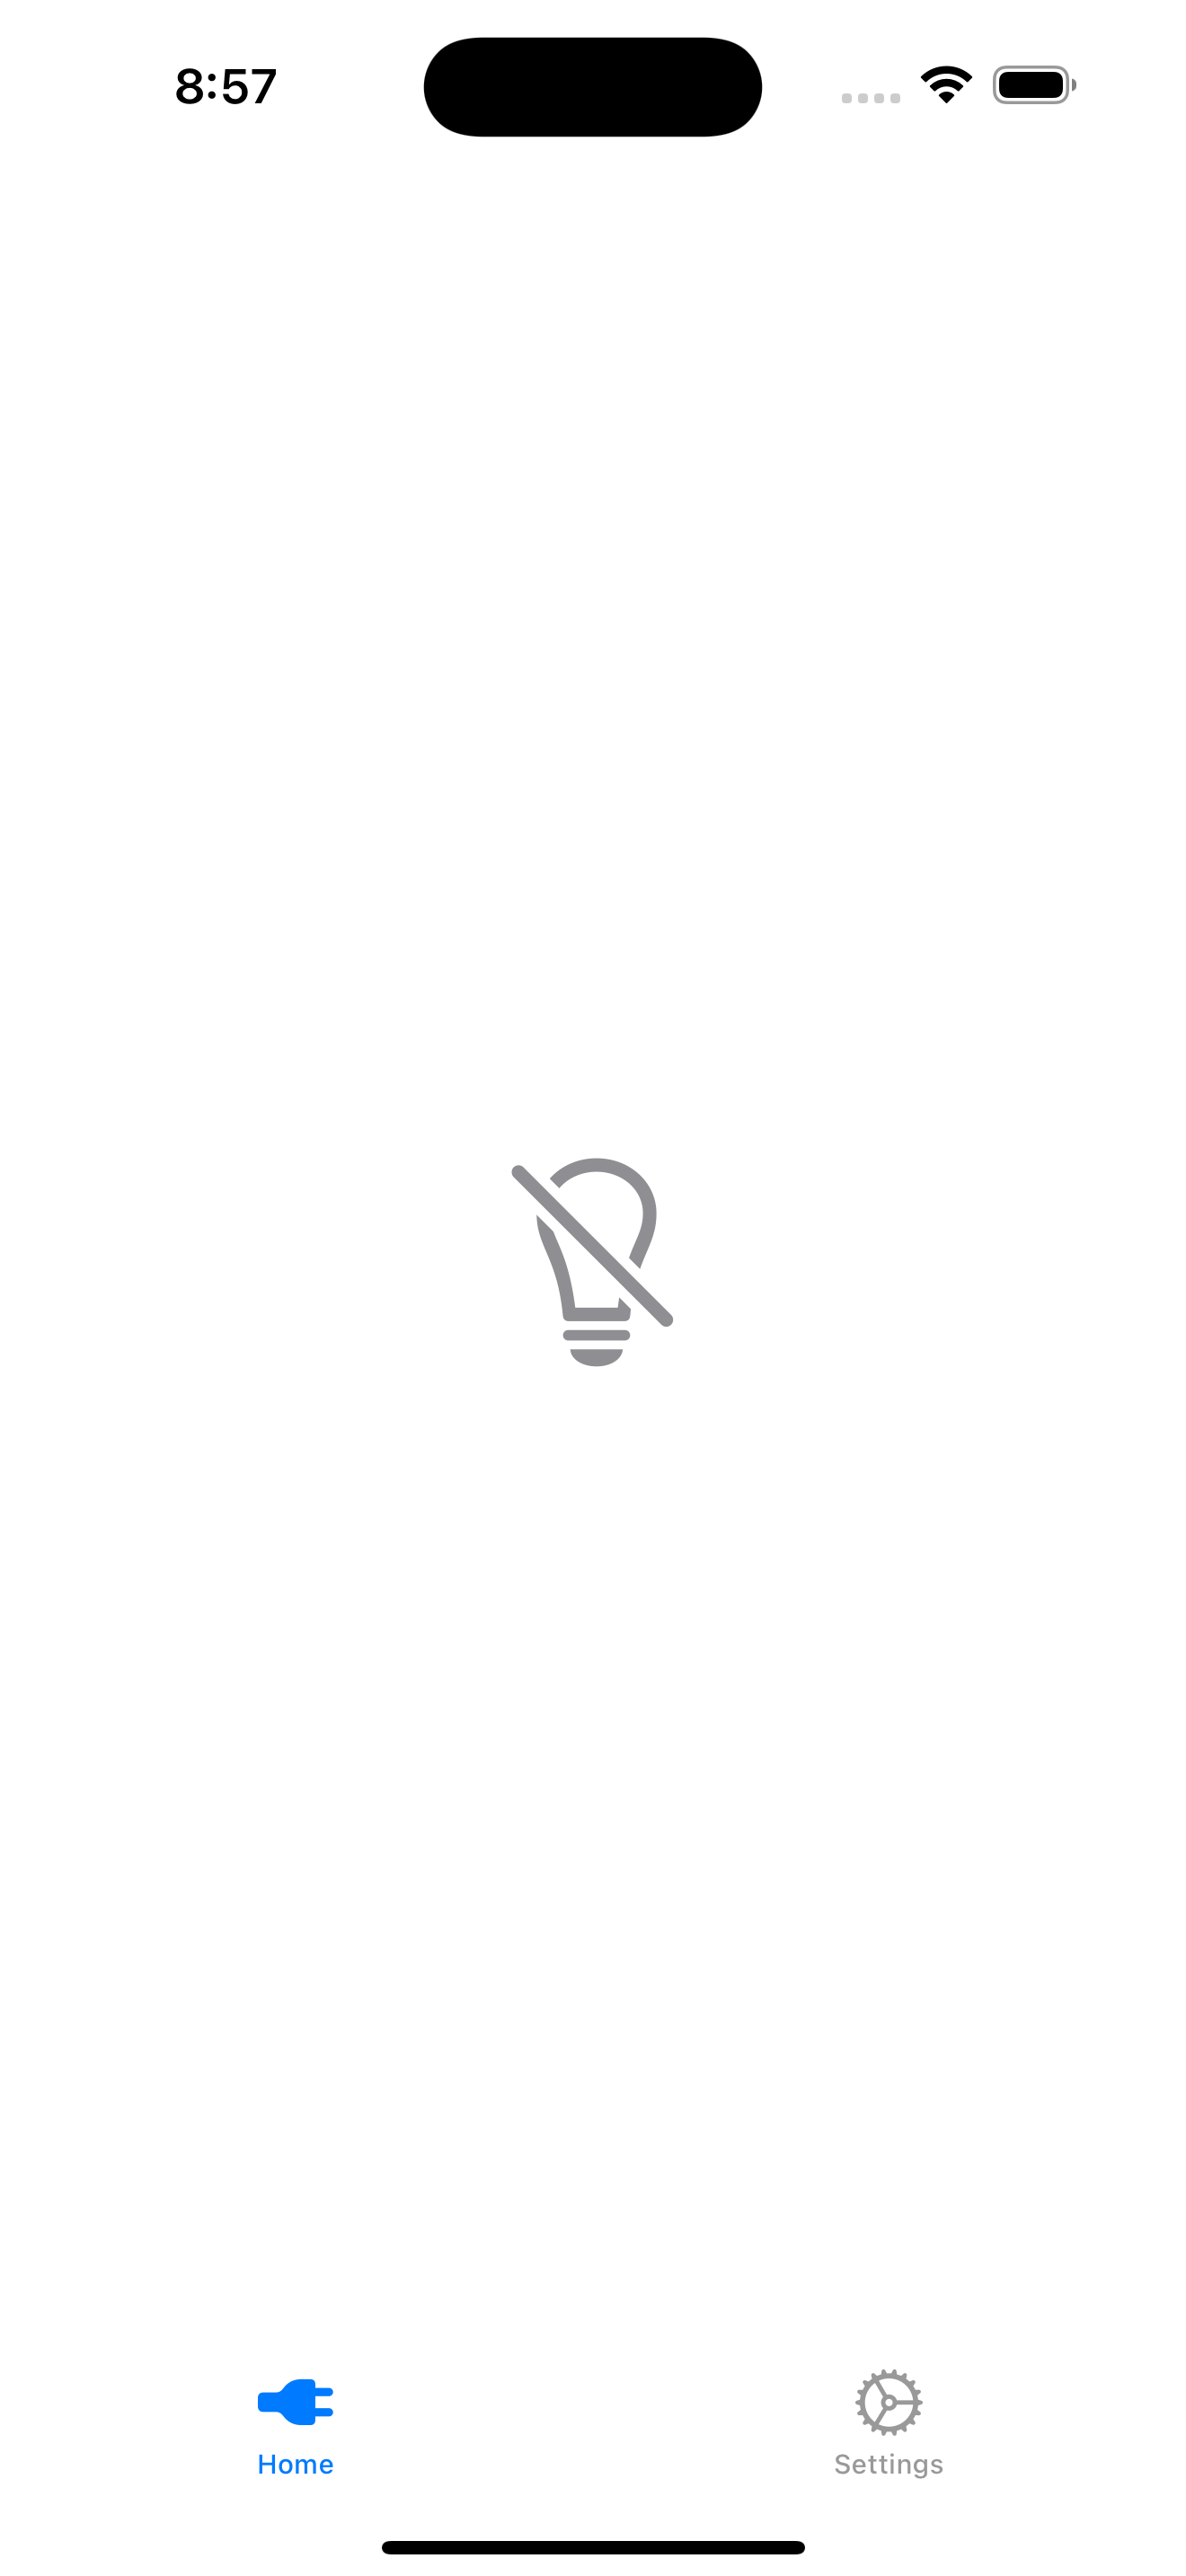
In order for the app to work correctly Siri Automations must be configured to connect power events to the application. Basically the Siri Automation calls into the app each time the power goes on or off. Additionally Siri Automations can be used to run a recurring notification (keep alive) so that the app sends a message once a day with the current power state. The app does not need to be currently running on the device for it to work because Siri will automatically start the app when the power state changes and the emails will be sent.
Although the app is specifically designed to monitor power to the iphone (based on Siri Automations), it could be used to monitor anything that you can write an automation to detect. The Siri automation could be configured to detect some other state and then call the Power On or Power Off shortcuts in the app, and the text for those shortcuts could be set accordingly to reflect this new event occuring.
Privacy Policy
The privacy policy can be found here.
Settings

There are a number of settings that must be set in order for the app to send messages.
- Enable Notifications: this toggle turns on or off the notifications from the app. With this off, the app will not send any notifications to the email addresses when the power state changes. Keep Alives will not be sent either.
- Add Date to Notifications: This toggle controls whether the current date and time are appended to the message sent. This is handy when determining exactly when the power was lost or restored, rather than relying on the time that the message was received at the client.
- Email 1,2,3: These email addresses specify the recipients of messages that this app sends.
- Email Subject: These two fields set the message text to be sent for the power on and power off messages.
- Email Message: These two fields set the message text to be sent for the power on and power off messages.
Sending Email Account

In order to send email notifications an email account is required with an email provider such as gmail. The PowerDetector app sends to this email account through SMTP, and then that account sends emails to the configured email addresses provided above.
You need to enter the email address and the app password for this account and the port number in the settings for this app. The password is somewhat more involved because it is an “App Password” rather than the actual account password. In the case of gmail, you can ask gmail to generate such a password, which is generally about a 16 character random string. Use this password rather then the normal account password and gmail will allow this app to send email through it to the destinations specified above. Gmail provides this password as a group of 4 sets of 4 characters with spaces between each set. Do not enter the spaces into the password field for this app since the spaces are not part of the password. They are just included to improve readability. It is advisable to create a new separate email account with gmail for this app rather than use an existing gmail account.
In order to create an app password, search on google with a search string similar to the following “gmail sign in with app passwords”. You can find up to date instructions for creating the app password from the search results. You need to setup 2-Step verification on the gmail account to be able to generate the app password. You may need to log into and out of the account a couple of times to actually get it to work correctly. The app password creation screen is under “Manage Your Google Account/Security/2-Step Verification/App Passwords”. When you create an app password you can copy the value, but after that point you can’t read previously created app passwords, you can only delete them and create new ones.
- Email: Enter the email address of the account that you are sending messages from - the account created above
- Password: Enter the app password here not the account password
- Name: Enter the name of the destination person you are sending to (can be any name as this doesn’t affect the send)
- Port: Generally port 587 is the correct port number to use.

Keep Alive Settings

Keep Alives: This app has the option to send a periodic message to the email destinations, reporting the current power state. Typically you might configure this to send once a day or once a week.
- Subject: Enter the subject for the Keep Alive periodic message
- Msg Power On and Off: Enter the message to send for each of the on and off states
- Email1,2,3: Toggle on the button for each email destination that should receive the periodic keep alive
Testing
On the previous view before clicking on the Keep Alive view, there is a “Send Test Email” button that makes it easy to check if the email server and destinations are configured correctly. Simply click this button and a test email will be sent to the configured emails. The top switch “Enable Notifications” does not need to be on for this to work. It can take several seconds for the email to get through. You can check in the sent email folder on the gmail account configured for the Sending Email Account if you are having problems. Any messages successfully sent should show up in that folder as well as at the destination email address.
Twilio Settings

This app has the option to send SMS text messages to a cell phone using the Twilio service. An account on Twilio is required to enable this feature. Log into the Twilio Messaging website and once on that account allocate a 10DLC number to be used as the source number for SMS messages. On the Twilio website there are various quickstarts to go over the steps necessary to get a valid sending 10DLC SMS number and to use it. Additionally an ApiKey should be created to use with this PowerDetector app. That key has an associated secret value, much like username/password. Those two values should be entered into the PowerDetect app as shown in the view to the side. You can create this apikey by clicking “Admin” on the upper right and selecting Account Management then click ApiKeys & Tokens in the left column. Then click “Create API Key” button on the upper right.
- Twilio Credentials: Enter the Apikey SID into the Account SID field and the associated secret into the AuthToken field. Alternatively the overall Twilio account SID and AuthToken can be used here (although Twilio recommends against it).
- Sending Phone Number: This is the 10DLC number allocated on the Twilio site that is a valid SMS sending number.
- Destination Phone Numbers: These are the number or numbers to receive SMS text messages from the PowerDetector App
- Send test SMS via Twilio: This button can be used to test that the Twilio configuration is correct. It sends a test message to the Destination Phone Numbers through Twilio.

Siri Automation Setup
Three Siri automations are required to complete the app setup. To enable these settings run the “ShortCuts” app that comes with iOS.
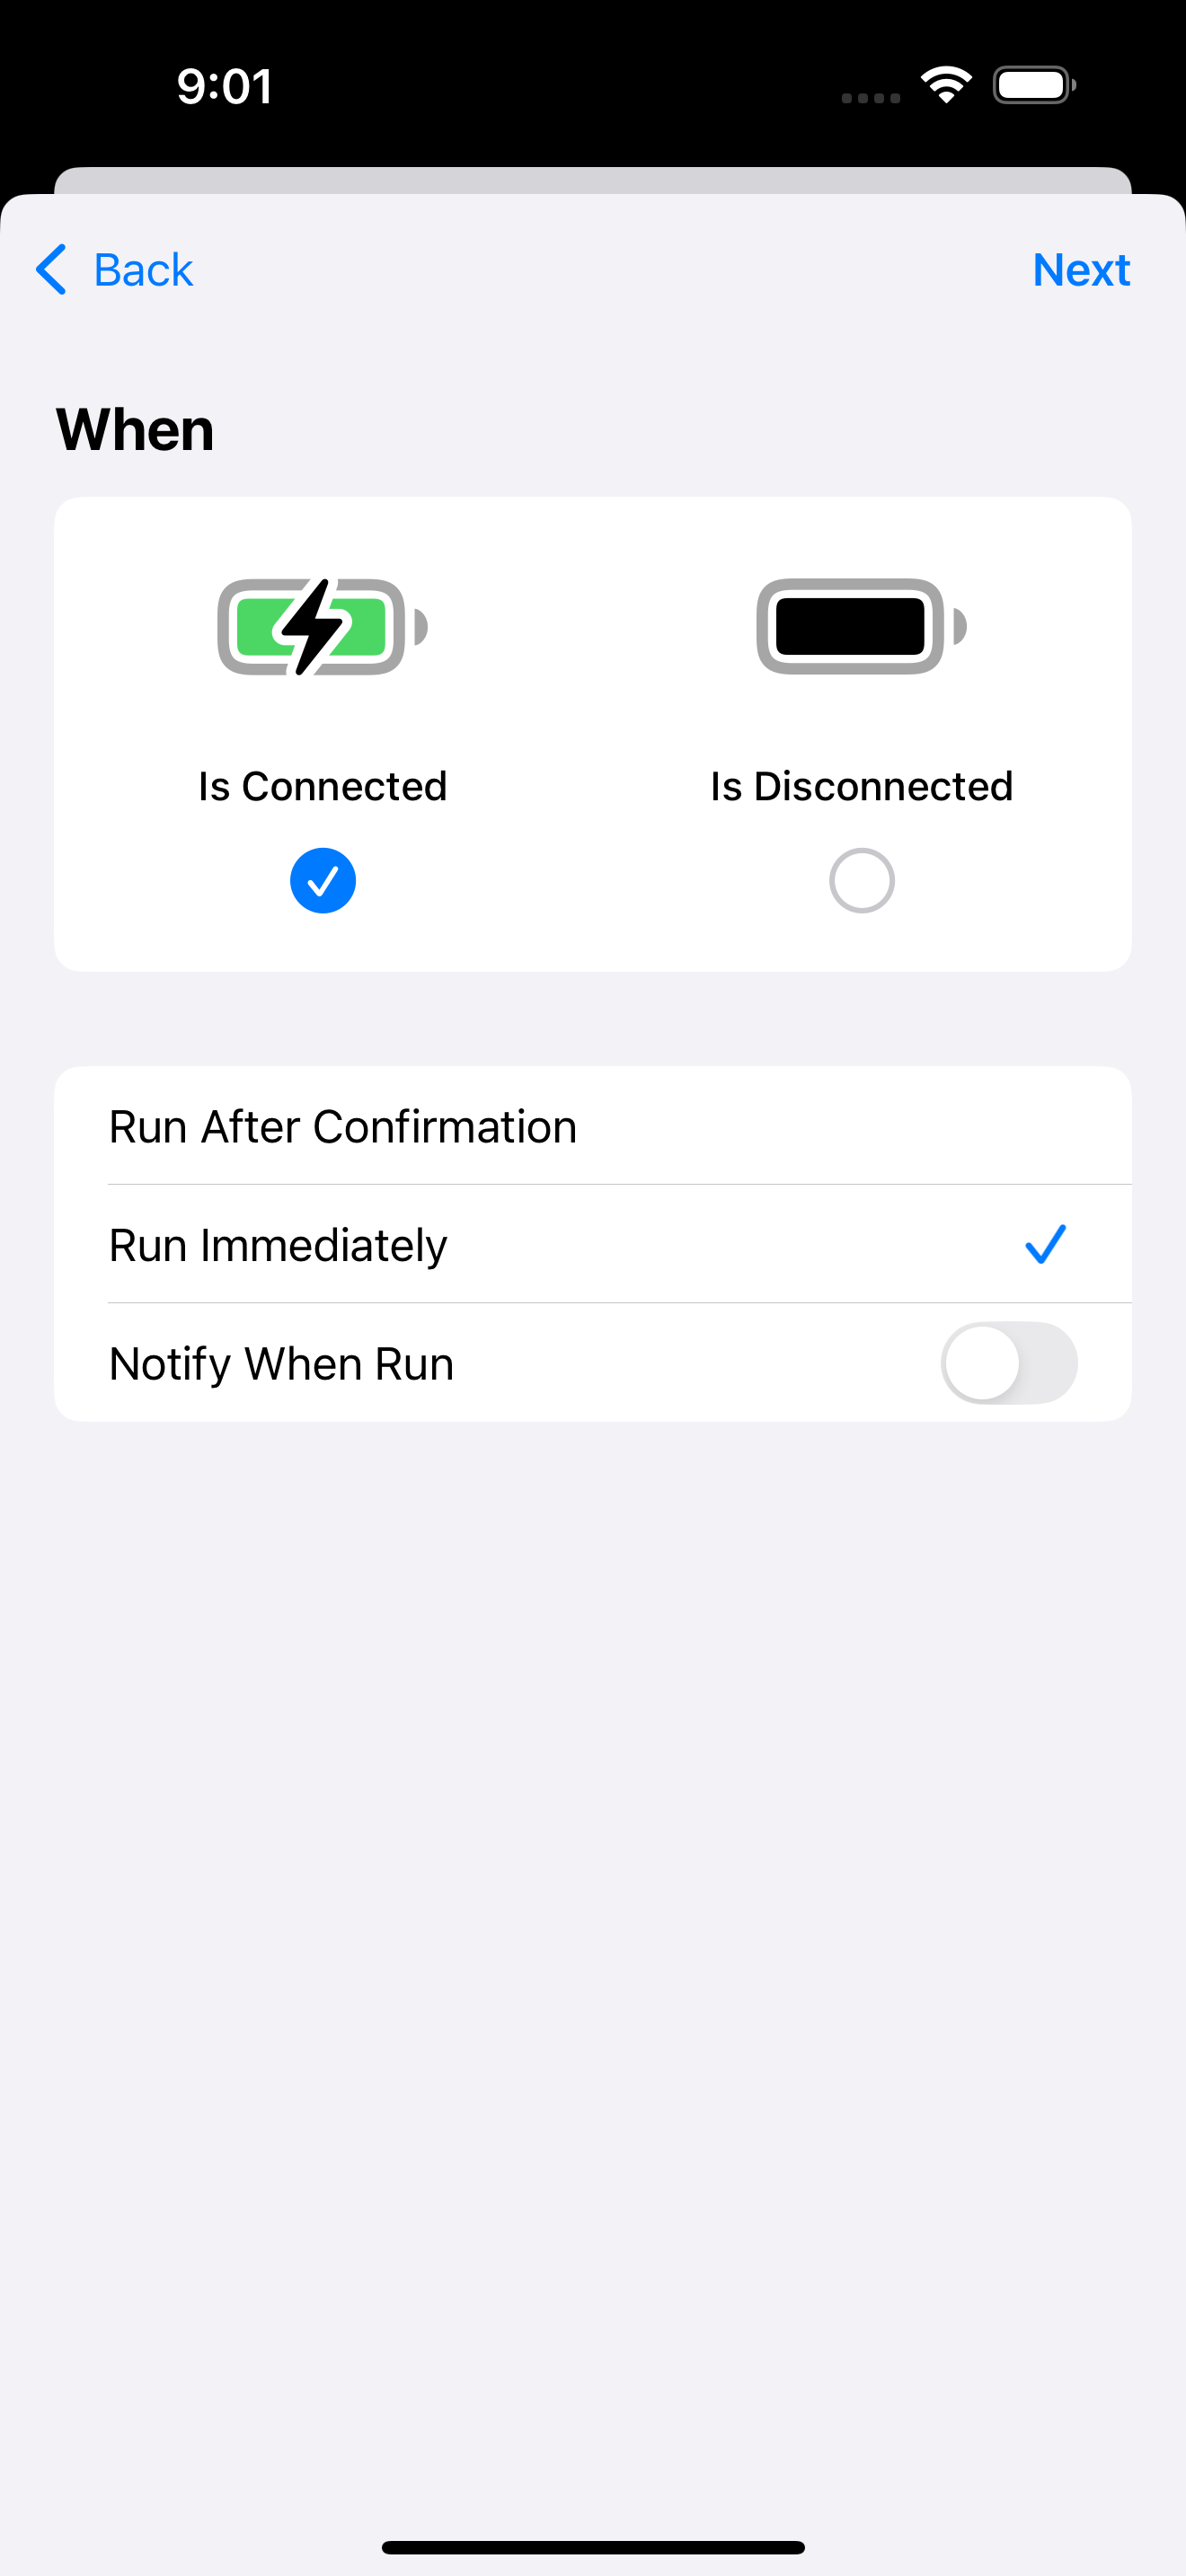
- Once Shortcuts is running click the center tab at the bottom that says “Automation”.
- Click the “+” in the upper right to create a new Automation
- In the Search box type “charger”
- Click on the “Charger” line that appears and make sure “IsConnected” is selected
- Click on “Run Immediately” just under that and be sure that “Notify when Run” is off
- Click Next in the upper right
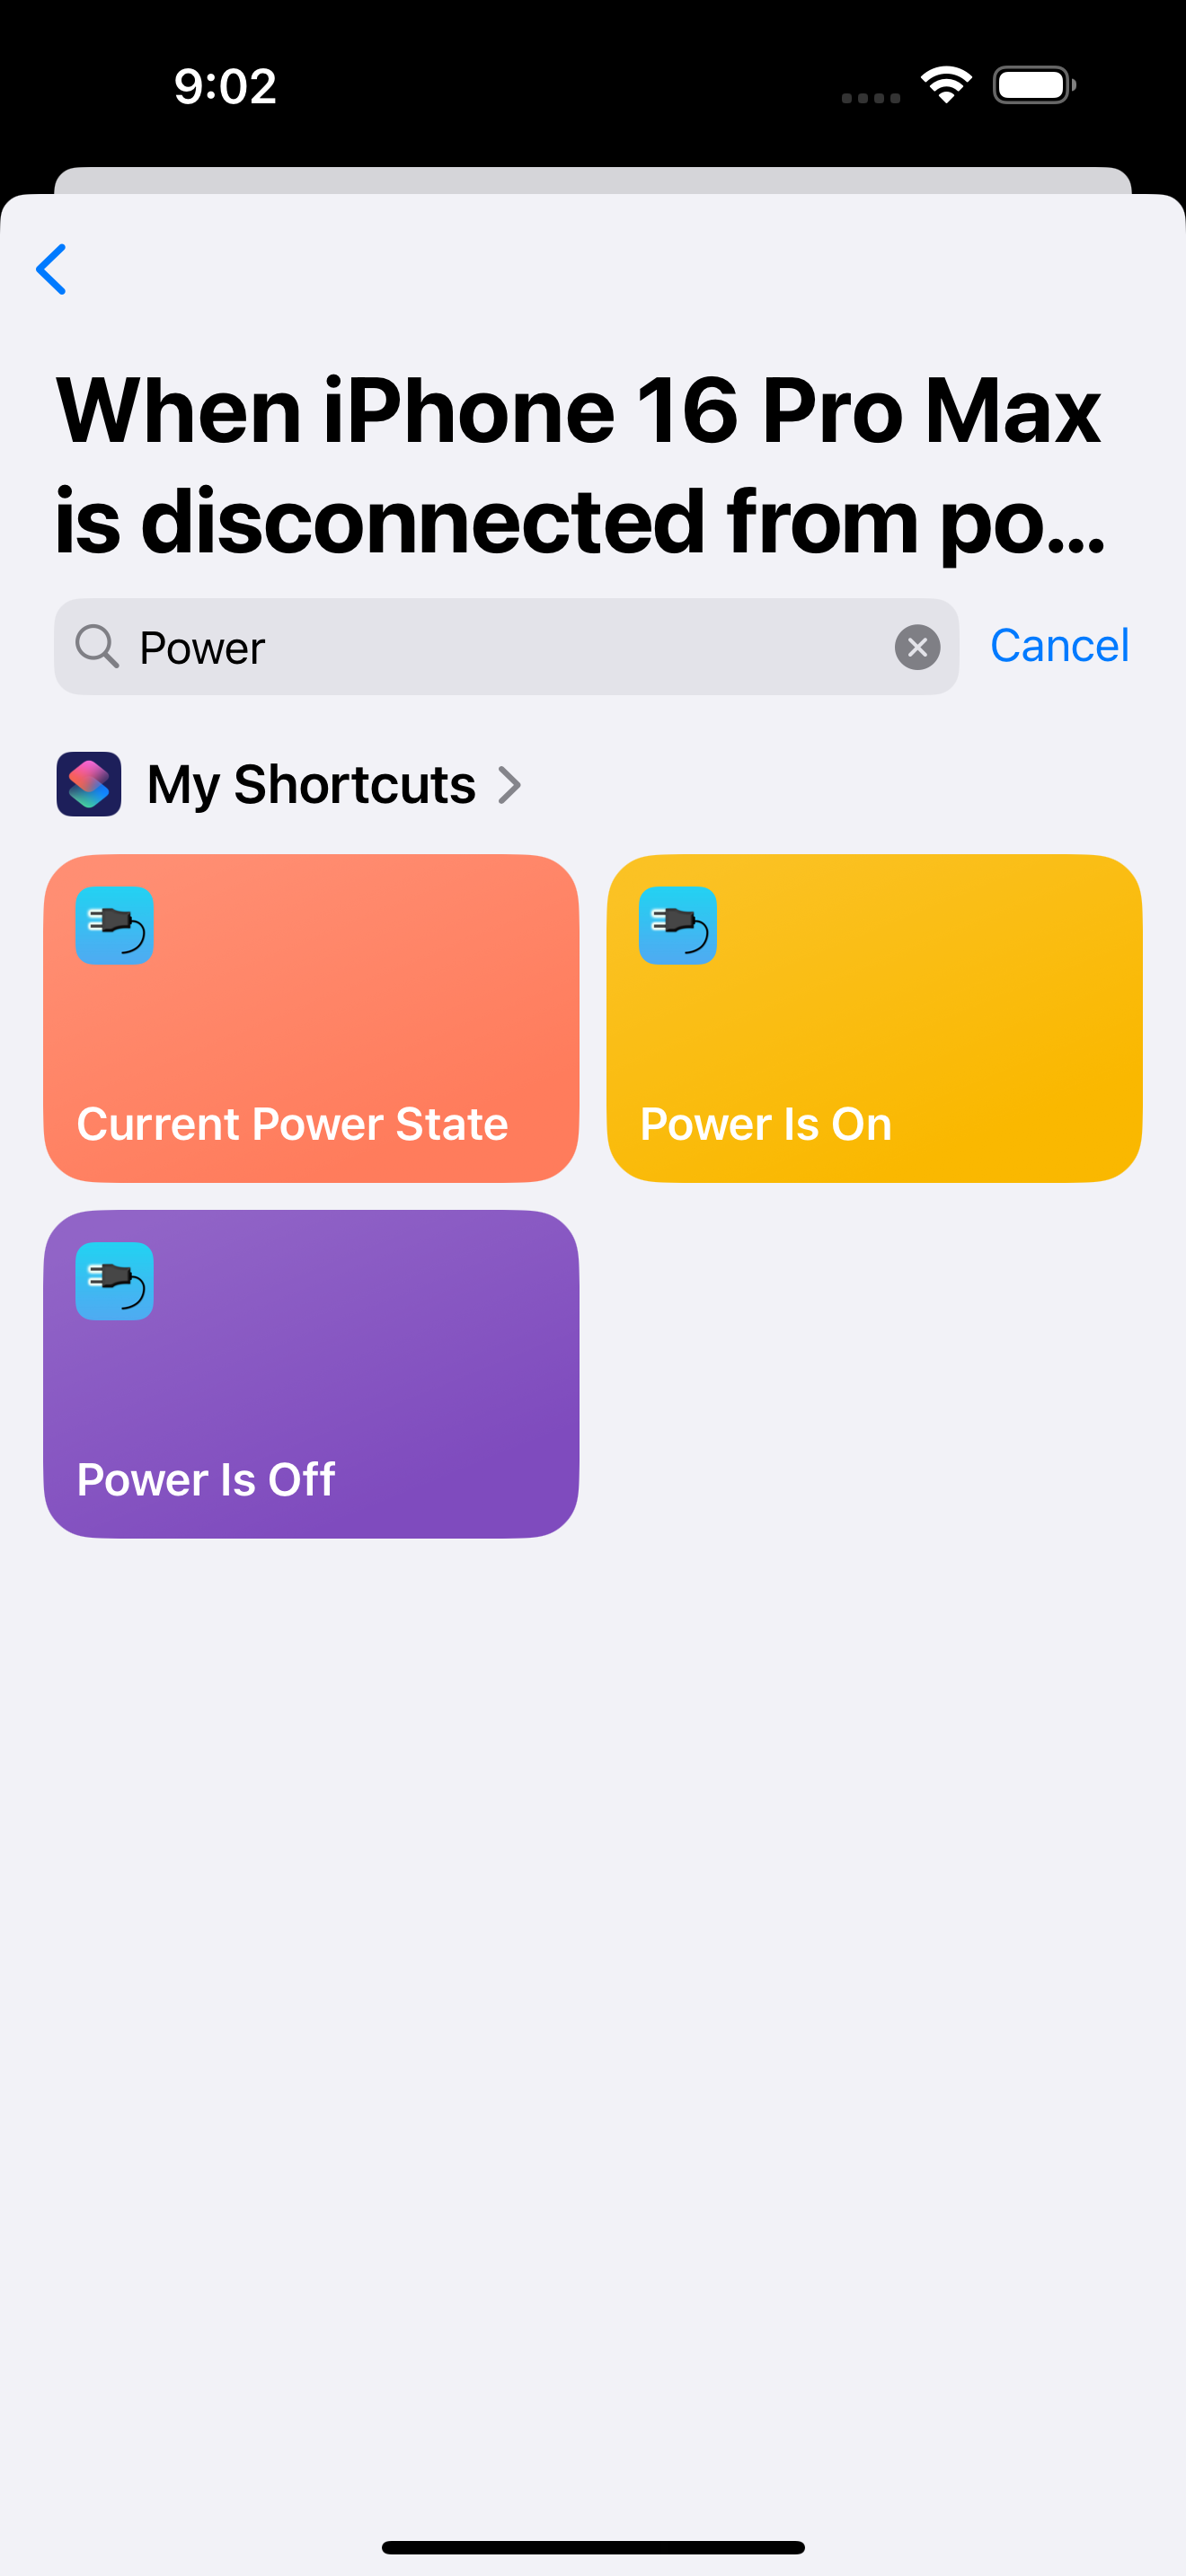
- Type “Power” in the search box that appears and select the “Power is On” tile
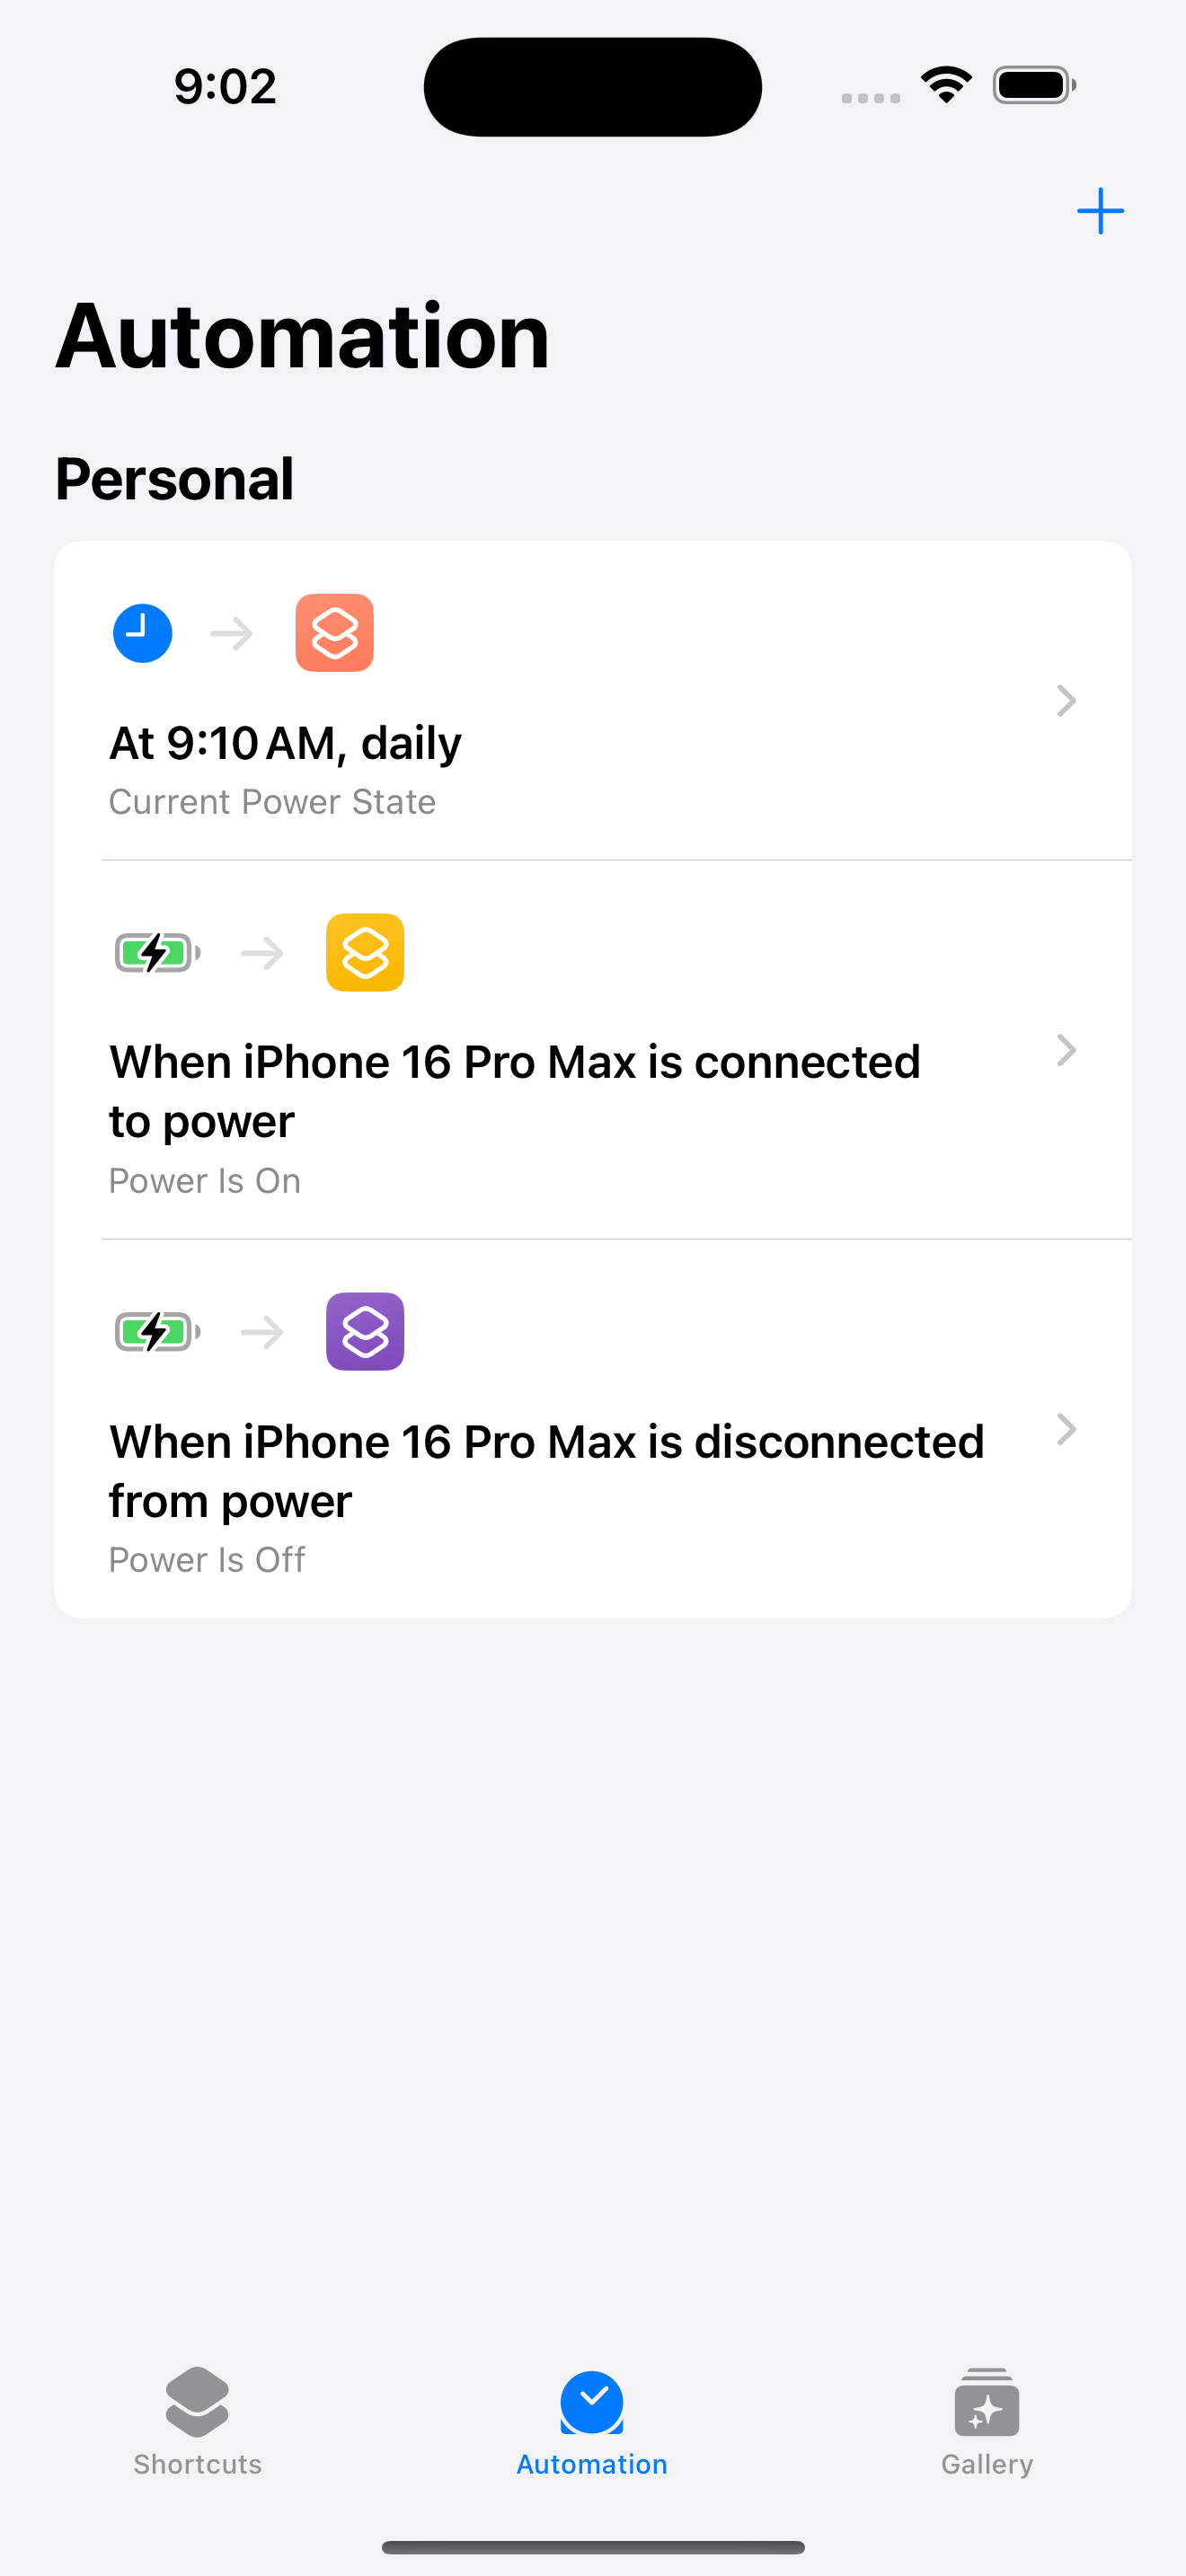
- The Automation is now complete and will return to the list of Automations and there should be an entry with a title like “When <your phone name> is connected to power”
- Perform the same steps again but this time under the Charger pick the “Is Disconnected” state and under Power select the “Power is Off” tile
Siri Shortcuts Repair
Three Siri shortcuts should be installed when the app is installed (as seen in the image above). If these shortcuts are missing or if they are changed in some way, they can easily be recreated using the following steps.
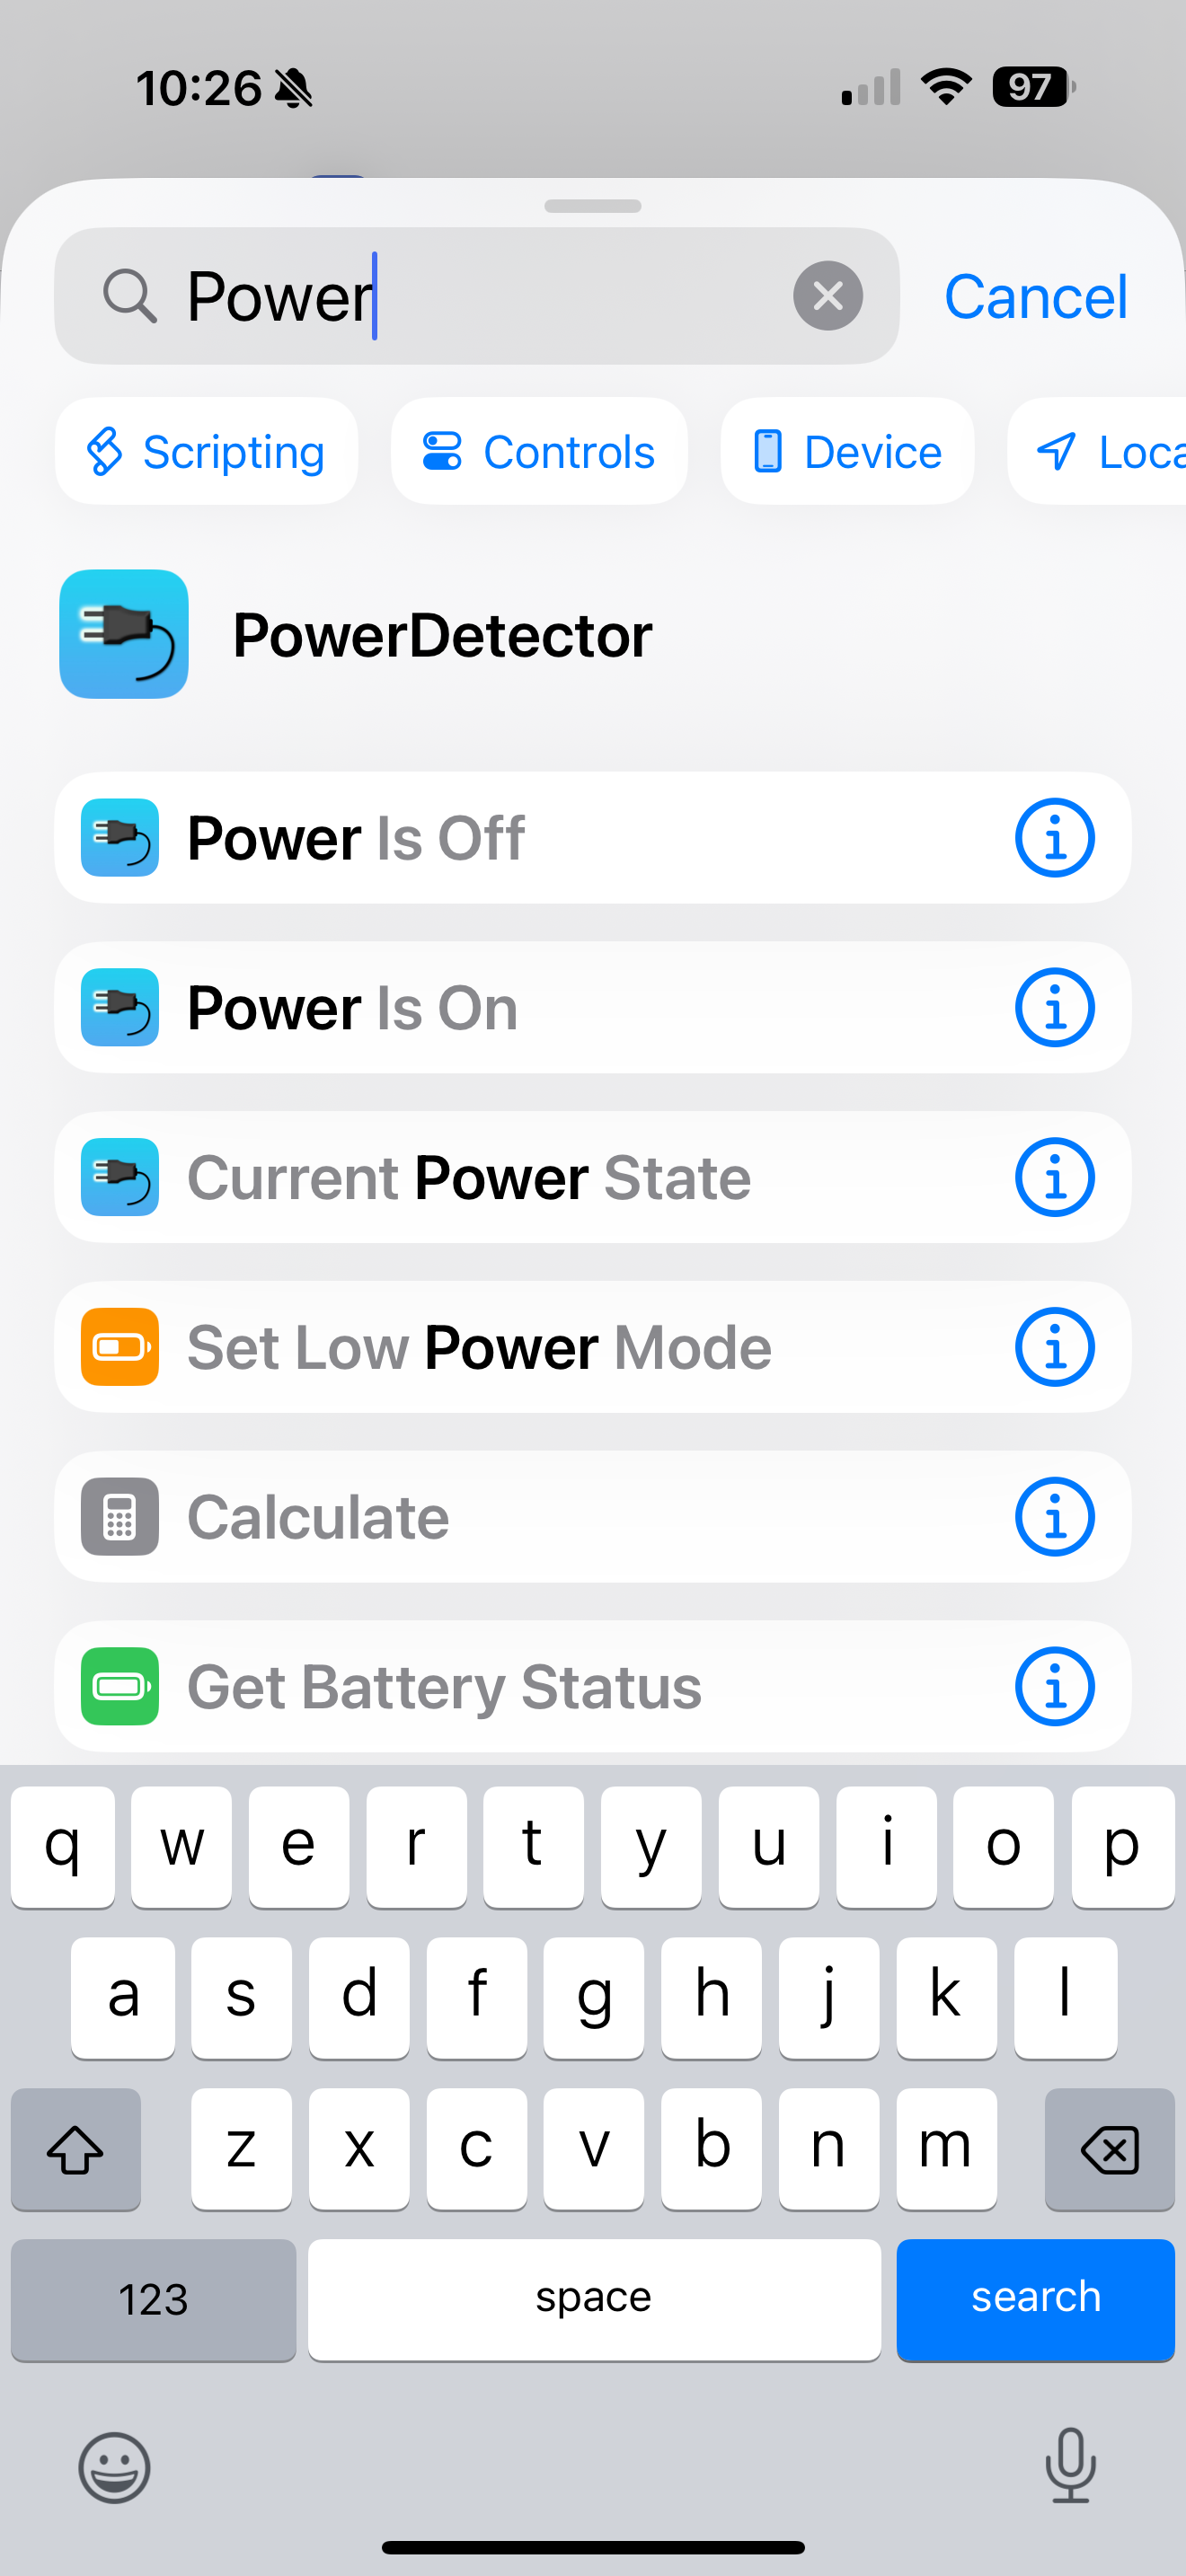
- Once Shortcuts is running click the left tab at the bottom that says “ShortCuts”.
- Click the “+” in the upper right to create a new Shortcut
- In the Search box type “power”
- Click on the “Power Is Off” line that appears
- Click on “Done” on the top right and that should pop you back to the list of Shortcuts where there will be new short cut called “Power Is Off”
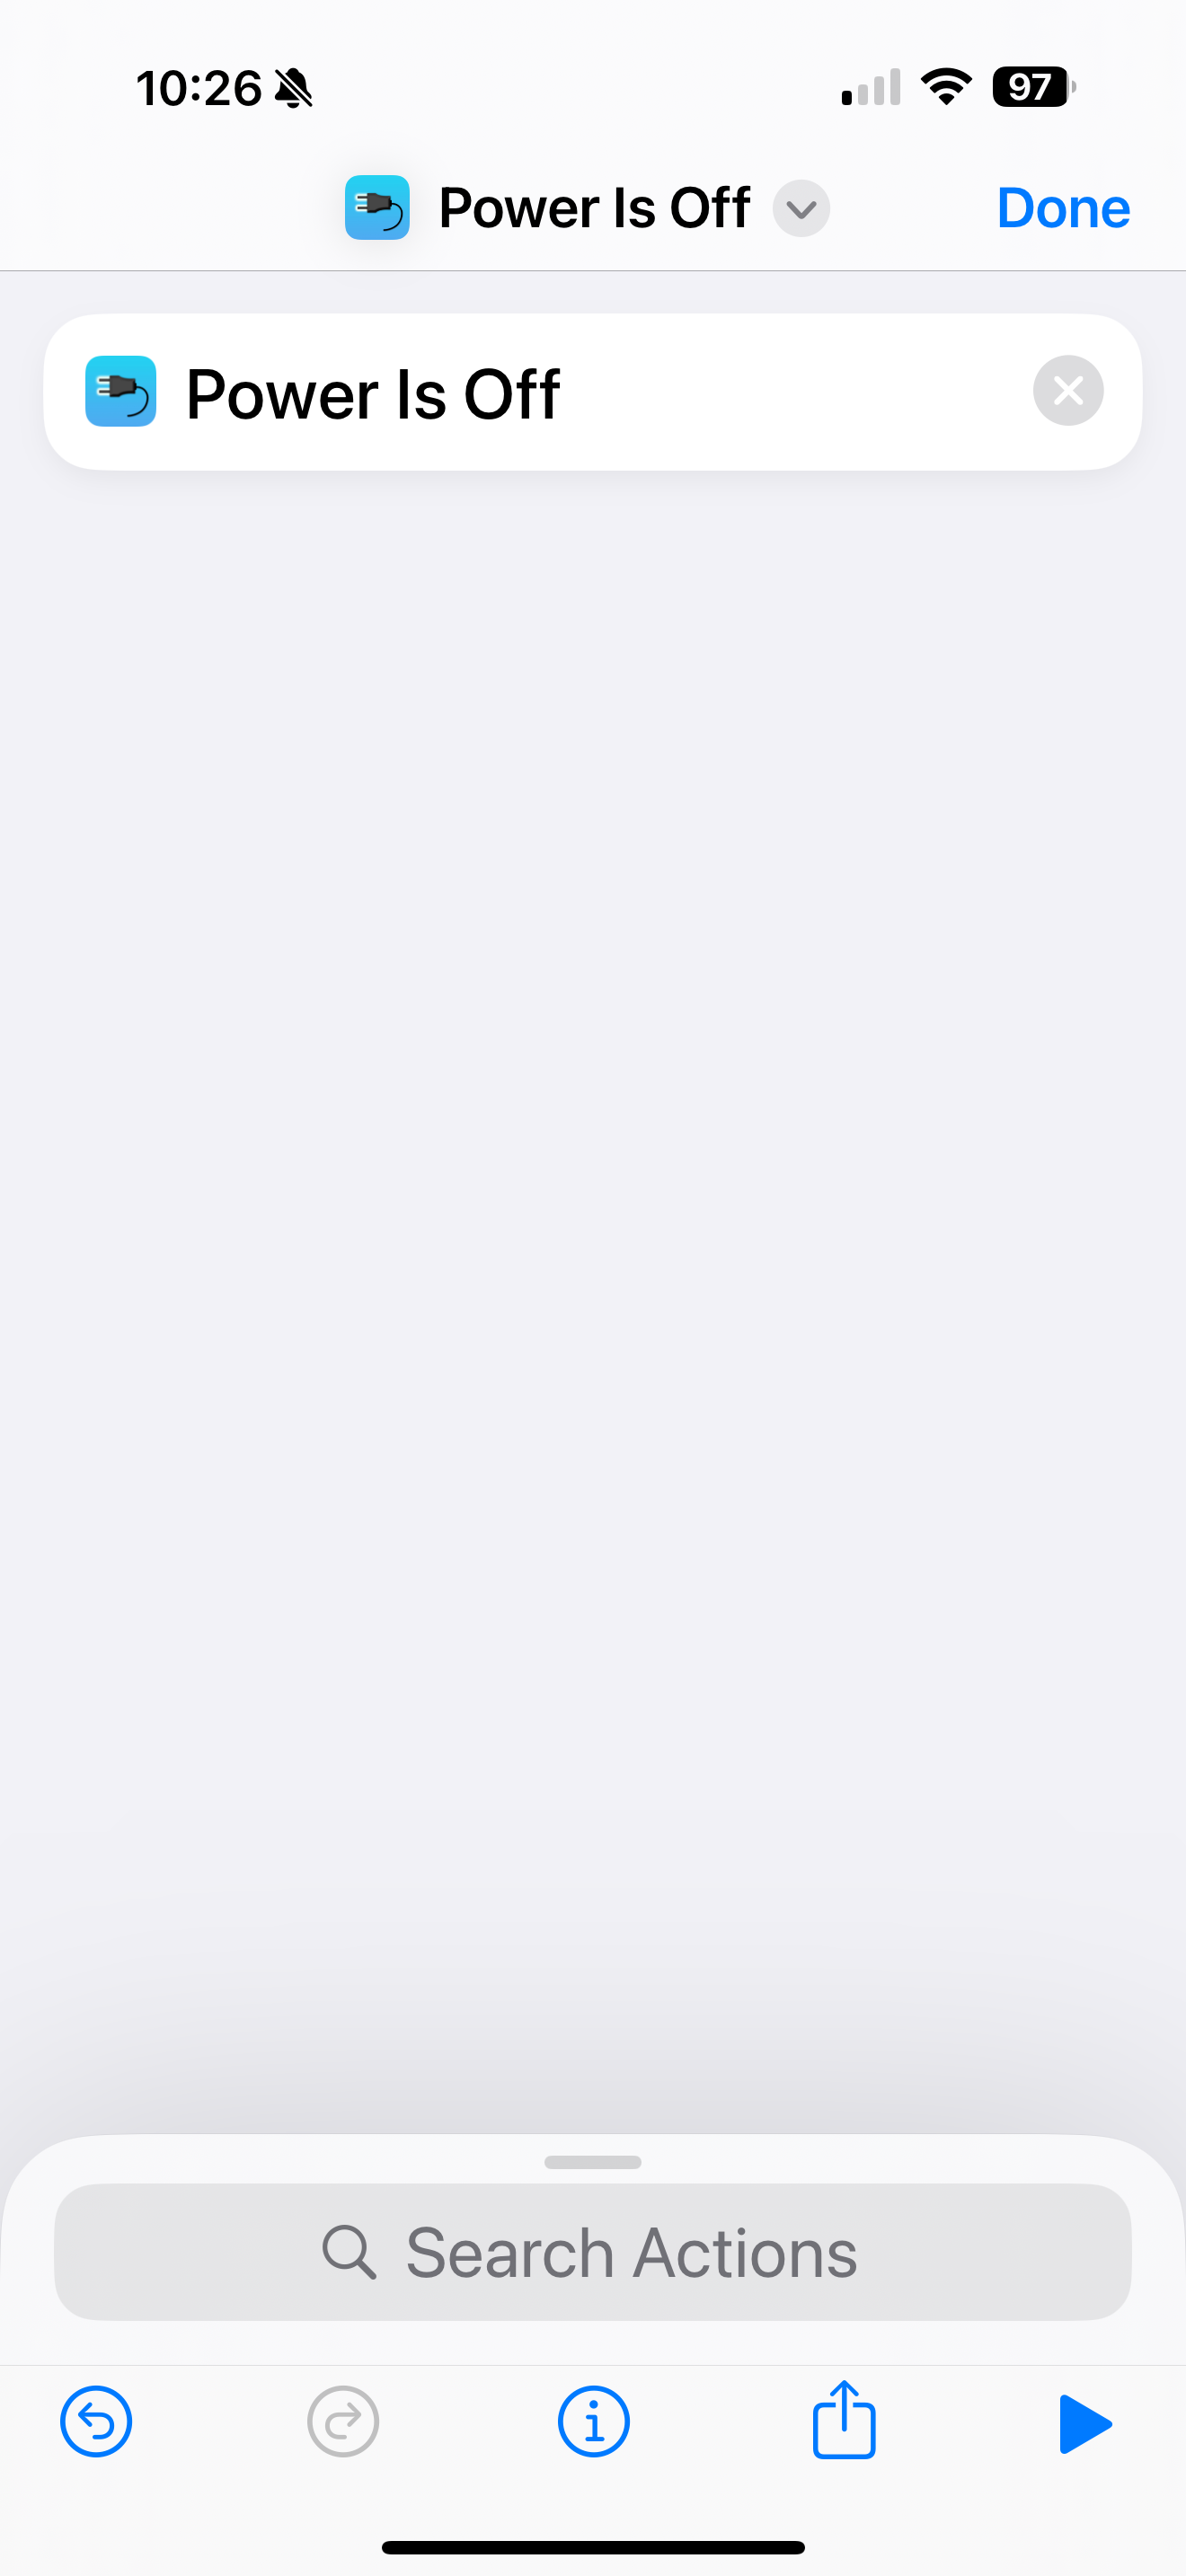
- Repeat the above steps to add the “Power Is On” shortcut and the “Current Power State” shortcut
Keep Alives
If you want to be informed periodically (once per day for example) that the power is still active at your location, create an additional automation shortcut:
- Click the “+” in the upper right to create a new Automation
- Click on “Time of Day” in the list and select “Time of Day” on the next view and then select the time you want the event to fire.
- Also select under “Repeat” whether you want it to run daily, weekly or monthly.
- Also select “Run Immediately” rather than run after confirmation. Leave “Notify when Run” off.
You should have these three automations when you are done:
